
How to Choose, Clean, and Seal Grout
When selecting tile for a home in Ventura or Santa Barbara County, the primary focus naturally falls on the tile color, size, texture, and pattern. Homeowners spend hours debating between porcelain wood-look planks, modern large-format tiles, or classic ceramic subway tiles. Yet, one of the most vital components of any successful tile installation and the key to its long-term aesthetic appeal is the element most often overlooked: Grout.
Grout is used to fill the space between tiles, and is also a critical structural and visual component that can completely transform the look, lifespan, and maintenance requirements of your entire tiled surface. Understanding what grout is and how to properly choose, clean, and seal it is the difference between a tile floor that looks brand new for decades and one that quickly appears older.

What is Grout and Why is Grout Important?
In simple terms, grout is a dense, cement- or epoxy-based compound that is mixed with water to form a thick paste. Although the primary purpose is to fill the grout joints , the narrow spaces left between tiles creating a solid, continuous surface, the full role is far more complex than a simple filler.
The Purpose of Grout in Tile Floors
Grout performs several crucial functions that are non-negotiable for a stable and durable tile installation:
- Structural Integrity: Grout locks the edges of the tiles together, preventing them from shifting, moving, or rubbing against each other. Especially important in high-traffic areas like kitchens and hallways where movement can lead to chipped edges or cracked tiles, grout turns hundreds of individual tiles into a unified, resilient flooring system.
- Moisture Barrier: While not fully waterproof on its own (especially cement-based grout), it acts as a primary defense against water penetration to the substrate (the floor or wall beneath the tile). Without grout, water would seep directly into the subfloor, leading to damage, mold, and mildew growth a major concern in high-humidity areas like California bathrooms and laundry rooms.
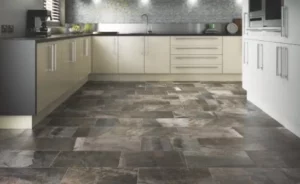
- Aesthetic Frame: Grout defines the pattern and shape of the tile floor as the visual grid that either seamlessly blends with the tile for a monolithic look or sharply contrasts to highlight a geometric design. The color and width of the grout joint directly influence the final design statement of the room.
- Hiding Imperfections: Grout lines provide a margin for error, helping to accommodate the natural size variations that occur even with the most precise manufactured tiles. Proper grouting allows for a clean, consistent installation line across the entire surface.
Choosing the Right Type of Grout
The two most important decisions regarding grout are the type of material and the color. Choosing correctly from the start saves years of tile maintenance headaches. The vast majority of residential installations use one of two primary types of grout for tile floors:
1. Cementitious Grout (Sanded and Unsanded)
- Composition: Traditional cement-based grouts are made from cement, fillers, and color pigments. They are the most common and affordable grout option.
- Sanded vs. Unsanded: Sanded grout contains fine sand particles for strength, making it ideal for wider grout joints (typically $1/8″$ or larger). Unsanded grout is used for very thin joints (less than $1/8″$) or when working with highly polished or glass tiles that could be scratched by sand.
- Pros: Easy to work with, readily available, and inexpensive.
- Cons: Highly porous, requiring regular sealing to prevent moisture absorption and staining. It is the most vulnerable to discoloration from spills, dirt, and mold.
2. Epoxy Grout
- Composition: A two-part system made of a resin and a hardener. Once mixed, it forms a rock-solid, non-porous material.
- Pros: Extremely durable, stain-proof, and completely non-porous (meaning it never needs sealing). Ideal for demanding areas like kitchen backsplashes, shower pans, and floors in homes with pets and high traffic.
- Cons: More expensive, harder to install (sets very quickly), and more challenging to clean from the tile surface during installation.
For virtually all residential applications, especially those prone to moisture and staining (kitchens, bathrooms, entries), epoxy grout is the superior choice, justifying a higher initial cost with zero maintenance sealing.
Choosing the Right Grout Color
The color of your grout has a monumental impact on your tile’s final appearance:
- Option 1: The Monochromatic/Blended Look (Matching Color)
- Goal: To make the tile floor appear seamless, like one large slab.
- Technique: Choose a grout color that is as close as possible to the tile color. For example, use a light gray grout with a silver-gray porcelain tile.
- Result: This creates a contemporary, clean, and minimalist aesthetic. It also makes a small room feel larger by eliminating the visual ‘grid’ effect. This is the preferred method for wood-look planks and large-format stone-look tiles.
- Option 2: The Contrasting Look (Opposing Color)
- Goal: To emphasize the shape, pattern, and layout of the individual tiles.
- Technique: Choose a color significantly lighter or darker than the tile. For example, classic white subway tile with dark gray or black grout.
- Result: This creates a bold, geometric, and graphic look that draws the eye to the pattern. It is perfect for hex tiles, penny rounds, and colorful patterned tiles.
- The Practical Choice: If you are using a light-colored tile in a high-traffic area (like an entryway), choosing a medium-gray or taupe grout offers a slight contrast while being far more forgiving than white grout, effectively camouflaging everyday dirt and wear.
The Grout Maintenance Guide: Clean & Seal
Once your tile and grout are perfectly installed, proper maintenance is the only way to ensure the long-lasting beauty of the surface.
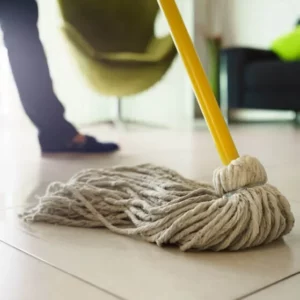
Step 1: Cleaning Your Grout
Unlike the tile itself, which is generally easy to wipe clean, cement-based grout is porous and acts like a sponge, absorbing stains, soap scum, and dirty water.
- Daily Care: Sweep or vacuum regularly to remove abrasive dirt and grit.
- Routine Cleaning: Use a pH-neutral cleaner specifically designed for tile and grout. Never use acidic cleaners (like vinegar or many common bathroom cleaners) on cement-based grout, as the acid will slowly dissolve the cement structure and degrade the sealant.
- Deep Cleaning: Use a soft-bristled brush (an old toothbrush is perfect for small areas) and a dedicated oxygenated-bleach or hydrogen peroxide-based cleaner to lift deep-set stains. Apply, let it sit for the recommended time, scrub, and thoroughly rinse.
Step 2: Sealing Your Grout (Cement Grout Only)
Complete this mandatory step for all cement-based grouts as it is the single most important action for preventing stains.
- Wait for Curing: Grout must be fully cured before sealing, which usually takes 48 to 72 hours (consult manufacturer instructions).
- Choose the Right Sealer: Use a high-quality penetrating sealer. This type of sealer is absorbed into the pores of the grout, creating an invisible, protective shield below the surface. Surface-coating sealers are not recommended as they can peel.
- Application: Apply the sealer only to the grout lines using a small brush or applicator wheel, carefully wiping any excess from the tile surface before it dries.
- Re-sealing: Depending on the product and the traffic level, most cement grouts need to be re-sealed every 1 to 3 years. A simple test: apply a drop of water to a clean, dry grout line. If the water is absorbed within a few minutes, it’s time to re-seal. If it beads up, the sealant is still working.
Ready to lock in the long-lasting beauty of your new tile with the right grout choice? Contact us or visit a Flooring 101 showroom in Oxnard, CA, Ventura, CA, Bakersfield, CA, Goleta, CA, Thousand Oaks, CA, Santa Maria, CA, or Simi Valley, CA, to view our wide selection of tile and specialized epoxy and cement grouts, and let our 50 years of experience serving Ventura, Kern, & Santa Barbara Counties guide your decision toward a flawless, low-maintenance finish.