How to Restore Shine to Dull Vinyl Flooring
Vinyl flooring is celebrated for its remarkable durability, versatility, and ease of maintenance, making it a popular choice in homes across Ventura, Kern, & Santa Barbara Counties for over 50 years. From the bustling energy of Simi Valley to the coastal charm of Ventura and Oxnard, homeowners trust vinyl for its resilience.
However, even the toughest vinyl can, over time, lose its initial luster, developing a dull appearance. This isn’t necessarily a sign of damage, but rather a build-up of residue, microscopic scratches, or improper cleaning methods. The good news is, you can often restore shine to dull vinyl flooring without professional help. At Flooring 101, we offer Ventura, Kern, & Santa Barbara Counties’ largest inventory of various flooring types, and we’re here to share our expert vinyl care tips on bringing your vinyl back to life.
Understanding Why Vinyl Flooring Becomes Dull
Before diving into restoration, it’s helpful to understand the common culprits behind dull vinyl:
- Residue Buildup: The most frequent cause. Using too much cleaning solution, using a cleaner that leaves a film (like “mop-and-shine” products or oil-based soaps), or not rinsing properly can leave a sticky residue that dulls the surface and attracts more dirt.
- Dirt and Grit: Fine particles of dirt, sand, and dust act as abrasives, causing tiny scratches on the wear layer over time. These micro-scratches scatter light, making the floor appear dull rather than reflective.
- Harsh Cleaners: Using abrasive cleaners, bleach, ammonia-based products, or even steam mops (not recommended for most vinyl) can strip the protective wear layer or create a haze.
- Lack of Proper Maintenance: Infrequent cleaning allows dirt and grime to accumulate and dull the finish.
- Wear Layer Erosion: Over many years, the wear layer itself can thin due to extreme traffic or improper care, reducing its natural sheen.

Step-by-Step Guide to Restore Shine to Dull Vinyl Flooring
Follow these steps to rejuvenate your vinyl floors and make dull vinyl flooring shine again. Remember, patience and proper technique are key!
Deep Clean to Remove Residue and Grime
This is the most critical first step. You need to strip away any dulling film.
- Sweep/Vacuum Thoroughly: Remove all loose dirt, dust, and debris. Use a soft-bristle broom or a vacuum with a hard-floor attachment. Do not skip this step, as any leftover grit can scratch the floor during wet cleaning.
- Prepare a Stripping Solution (Mild First):
- Option A (Most Common – White Vinegar): Mix one cup of white vinegar with one gallon of warm water. Vinegar is acidic and helps break down residue without harming vinyl.
- Option B (Baking Soda Paste for Spots): For stubborn, localized dull spots or sticky residue, mix baking soda with a small amount of warm water to form a paste.
- Option C (Rubbing Alcohol for Grease): For oily or greasy residue, use rubbing alcohol on a clean cloth, testing in an inconspicuous area first.
- Apply and Scrub (Gently):
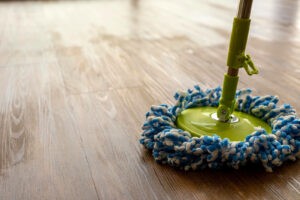
- For Vinegar Solution: Dampen a clean microfiber mop (don’t saturate!) with the solution and mop the floor in small sections. For heavily soiled or dulled areas, you might need to get on your hands and knees and gently scrub with a soft-bristle brush or a non-abrasive sponge. Focus on areas with visible film.
- For Baking Soda Paste: Apply the paste directly to the dull spot and gently rub with a soft cloth or sponge.
- Rinse Thoroughly (Crucial Step): After scrubbing a section, immediately rinse it with clean, plain water using a separate clean mop or cloths that are only slightly damp. This is paramount to removing the loosened residue. Change your rinse water frequently to ensure you’re lifting the dirt, not spreading it.
- Dry Completely: Use a clean, dry microfiber cloth to thoroughly dry the floor. Air drying can lead to water spots or streaks.
Address Deeper Scratches and Scuffs
Once the floor is clean, assess for physical damage.
- Minor Scuffs: For black scuff marks, gently rub them with a clean tennis ball. The rubber helps lift the mark without scratching the vinyl.
- Light Surface Scratches: For very light scratches that don’t penetrate the wear layer, a tiny amount of jojoba oil or mineral oil applied with a clean cloth and buffed gently can sometimes temporarily minimize their appearance. Test this in an inconspicuous area first. For deeper scratches, professional repair or replacement might be necessary.
- Buffing (with caution): For truly resilient vinyl, some homeowners use a low-speed buffer with a non-abrasive buffing pad after deep cleaning. This should only be done if specifically recommended by the manufacturer for your type of vinyl and with extreme caution, as improper buffing can damage the wear layer.
Consider a Vinyl Floor Finish/Restorer
Once your floor is meticulously clean and dry, if it still lacks shine due to wear layer erosion or you desire an extra gleam, a vinyl floor finish or restorer can be applied.
- Choose the Right Product: Select a high-quality, acrylic-based vinyl floor finish or polish (often called “floor restorer” or “shine restorer”) designed specifically for vinyl or resilient flooring. Avoid wax-based products, as vinyl does not require waxing.
- Application:
- Ensure Cleanliness: The floor must be impeccably clean and dry before application. Any dirt or residue will be sealed under the finish.
- Thin, Even Coats: Apply a thin, even coat using a clean sponge mop or an applicator designed for floor finishes.
- Allow Drying Time: Let each coat dry completely (typically 30-60 minutes) before applying the next. Most products recommend 2-3 thin coats for best results.
- Avoid Over-Application: Too much product can lead to stickiness or a milky appearance.
- Maintenance: These finishes are not permanent. They typically last a few months to a year, depending on traffic, and will need reapplication after deep cleaning. Always follow the manufacturer’s specific instructions.
Ongoing Prevention: Keeping Vinyl Radiant
Once you’ve managed to restore shine to dull vinyl flooring, implement these practices to keep it looking great:
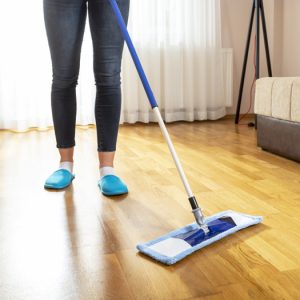
- Regular Cleaning: Consistent sweeping/vacuuming is key to preventing abrasive grit buildup.
- Proper Cleaning Solutions: Stick to pH-neutral vinyl floor cleaners or white vinegar and water. Avoid harsh chemicals, “mop-and-shine” products, and excessive water.
- Protect Entrances: Use high-quality doormats at all entry points to trap dirt and moisture.
- Furniture Pads: Place felt protectors under furniture legs to prevent scratches and dents.
- Trim Pet Nails: Keep pet claws trimmed to minimize scratches.
Choose Flooring 101 for Your Vinyl Needs
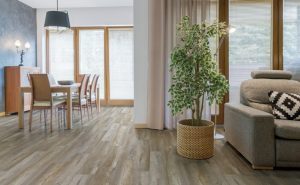
Bringing back the sparkle to dull vinyl flooring is a rewarding endeavor that can dramatically refresh your home’s ambiance. Understanding the root causes of dullness and implementing proper cleaning and maintenance techniques are crucial steps to ensuring your vinyl floors retain their beauty and longevity. This is where the quality of your flooring provider and their advice become truly paramount.
For over 50 years, Flooring 101 has delivered exceptional flooring services across Ventura and Santa Barbara Counties. Our showrooms in Simi Valley, Ventura, Oxnard, Thousand Oaks, Goleta, Santa Maria, and Bakersfield, CA, proudly house Ventura, Kern, & Santa Barbara Counties’ largest inventory of Luxury Vinyl Tile (LVT) and other resilient flooring. Beyond selection, our knowledgeable staff excels at guiding you through the best maintenance practices tailored to your specific flooring. Get an in-home estimate or visit one of our showrooms today! Let Flooring 101 be your partner in bringing that sought-after sparkle back to your home.
