The Biggest Keys to DIY Laminate Installation
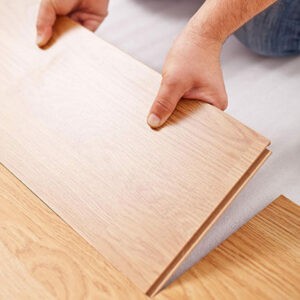
Many homeowners love attractive laminate flooring for the hardwood and stone realism these surfaces offer while remaining easier to purchase, install, and maintain. In fact, with many laminate options offering floating floor installation capability, some homeowners purchase laminate to complete a DIY installation in the home! While we recommend hiring professional installation unless you have prior flooring installation experience, laminate floors will be easier to install than real wood or stone.
If you are attempting to install your own surfaces, it’s extremely important to avoid the most common mistakes when laying laminate flooring. Although mistakes can happen, many are easily avoidable with proper preparation and patience during the installation process. To ensure that your new flooring project goes as smooth as possible, here are the biggest keys to DIY laminate installation:

Laminate Flooring Acclimation Before Installation
When you are approaching your laminate installation project, it’s extremely important to bring in the boxes of laminate into the rooms to acclimate for at least 24-48 hours beforehand. This key step is easy to forget but your laminate needs to adjust to the room’s temperature and humidity levels before installation. Proper acclimation will reduce the likelihood of cracks or gaps in the finished floor, helping to ensure long-term satisfaction.
Preparing Your Subfloor for Laminate Installation
Before installing any type of flooring, the subfloor must be assessed beforehand to prevent long-term issues to the look and performance of your floor. Laminate, like any flooring material, will install best over a smooth, level subfloor and look the best when finished. If you have removed the existing floors, you can repair or improve your subfloor with sanded plywood floorboards, fitted sheets of hardwood, or using cement compounds. If you are installing a floating laminate floor, using underlayment will help fills gaps and better ensure dimensional stability.

Planning Expansion Gaps for Laminate Installation
All DIY flooring enthusiasts need to thoroughly research and understand ‘expansion gaps’ before attempting an installation at home! Expansion gaps are intentional spaces between the walls of the room and the floor, designed to account for indoor temperature and humidity fluctuation throughout the year. Although laminate will expand and contract less than real wood, joints can potentially unlock, and the floor can actually lift when the appropriate expansion gaps are not created during installation.
Cutting Laminate Flooring During Installation
Since many homeowners have rooms in the home with unique dimensions, it’s extremely important to know how to cut laminate flooring to accommodate these spaces. A mitre saw, handsaw, circular saw, or jigsaw will be needed to complete this task, and we recommend a pencil, sanding block, and a saw with high tooth-per-inch blade for the cleanest cutting process. When marking the line you want to cut on a laminate piece, leave a quarter inch as an expansion gap. After using the saw blade to slowly cut the piece, always wait for the blade to stop completely before removing it. Then, use the sanding block to clean up the edge as needed.

Planning DIY Laminate Flooring Installation
If you are planning a DIY laminate flooring installation, sometimes a professional opinion or design consultation can help you to finalize your vision. Make sure to follow our Planning a Flooring Project checklist to help you plan carefully and analyze every step. Our valuable project guide will touch on measuring square footage, finding laminate inspiration, determining your budget, or requesting laminate flooring samples. As always, contact Flooring 101 or stop by any one of our seven Flooring 101 locations to start your DIY project with confidence.


